
 1671
1671
Setting Up Multifactor Authentication (MFA)
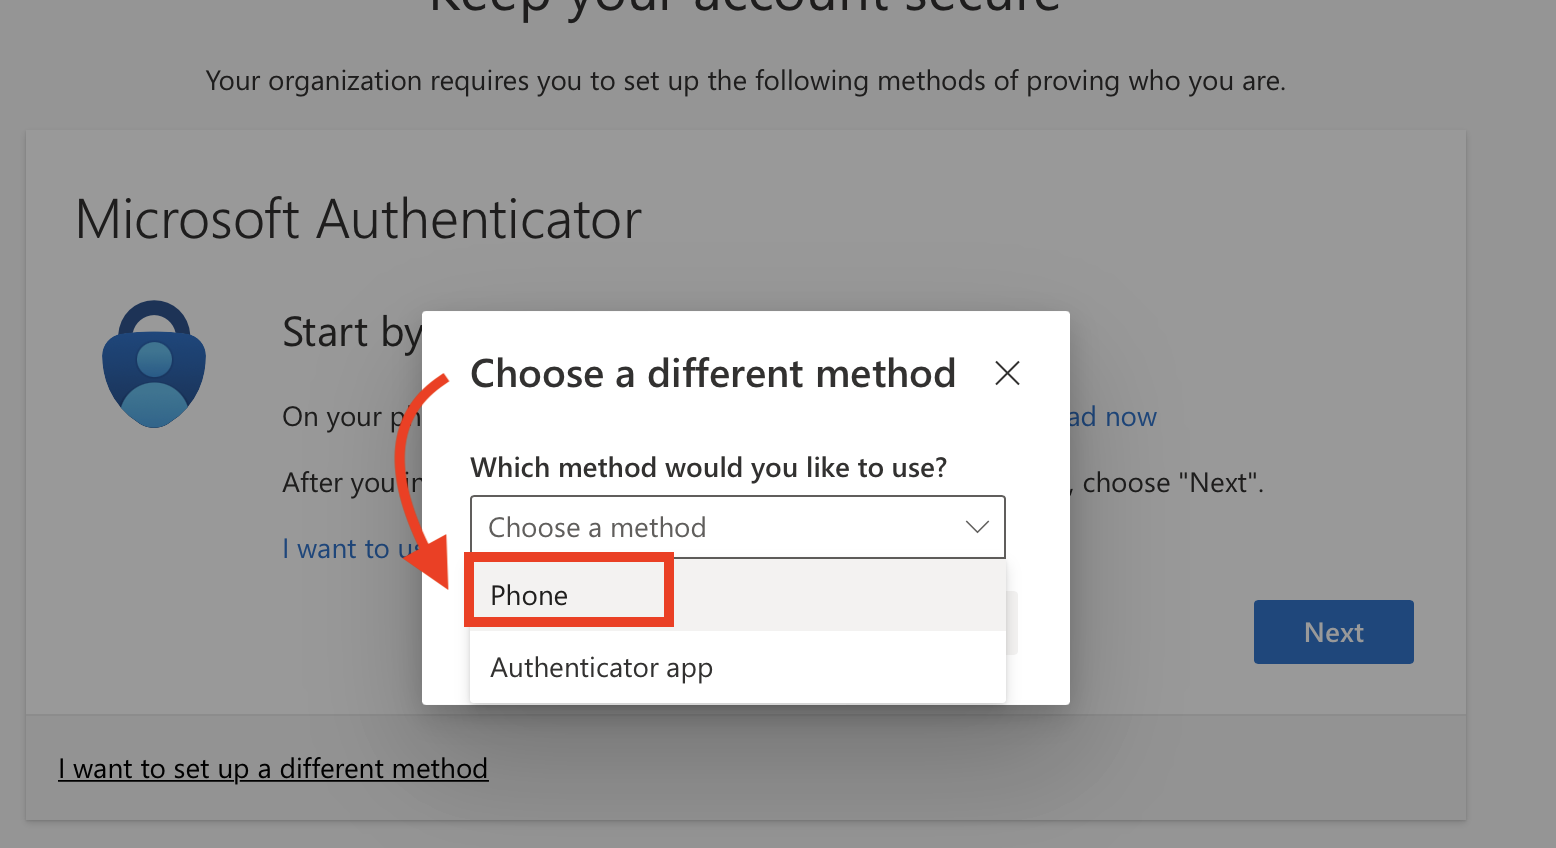
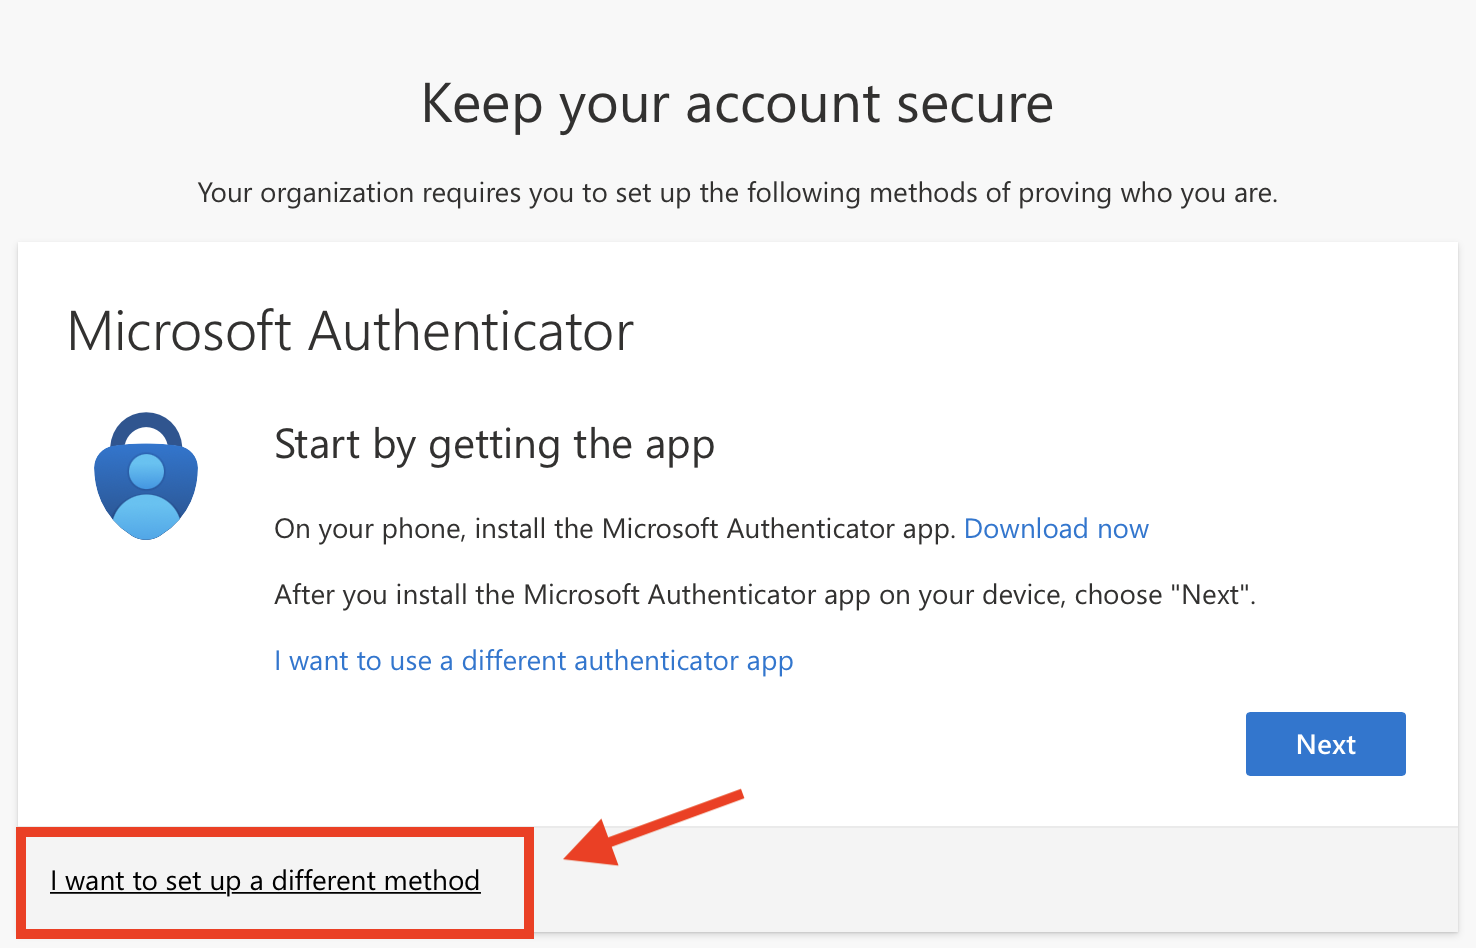
You have the option of setting up MFA using a text or phone call verification on a personal cell phone or by using the Microsoft Authenticator App on a personal cell phone or school iPad. It is easier to initially do the setup with text or phone call verification on a cell phone but the Authenticator App is easier in the long run once it is setup and configured.
If you are using a cell phone with text or a phone call to set up MFA, follow the directions below. If you are using the Microsoft Authenticator App to set up email on your laptop, follow the directions here. If you are using the Microsoft Authenticator App to set up your iPad email IF your iPad is the only PASD device you are assigned, directions are here. This process is time sensitive so please ensure you have 10 minutes to complete the process all at once.
If you have a laptop and an iPad, please set up MFA on your laptop. You will be asked to approve the sign in on other devices.
Step 1: Sign out of your email account on your laptop browser. On a phone or iPad, please remove your email and add it again. On an iPhone and iPad, go to Settings-Mail-Accounts-find your PASD email account, which defaults to ‘Exchange’, and then delete your account. Once it is deleted, please add it again.
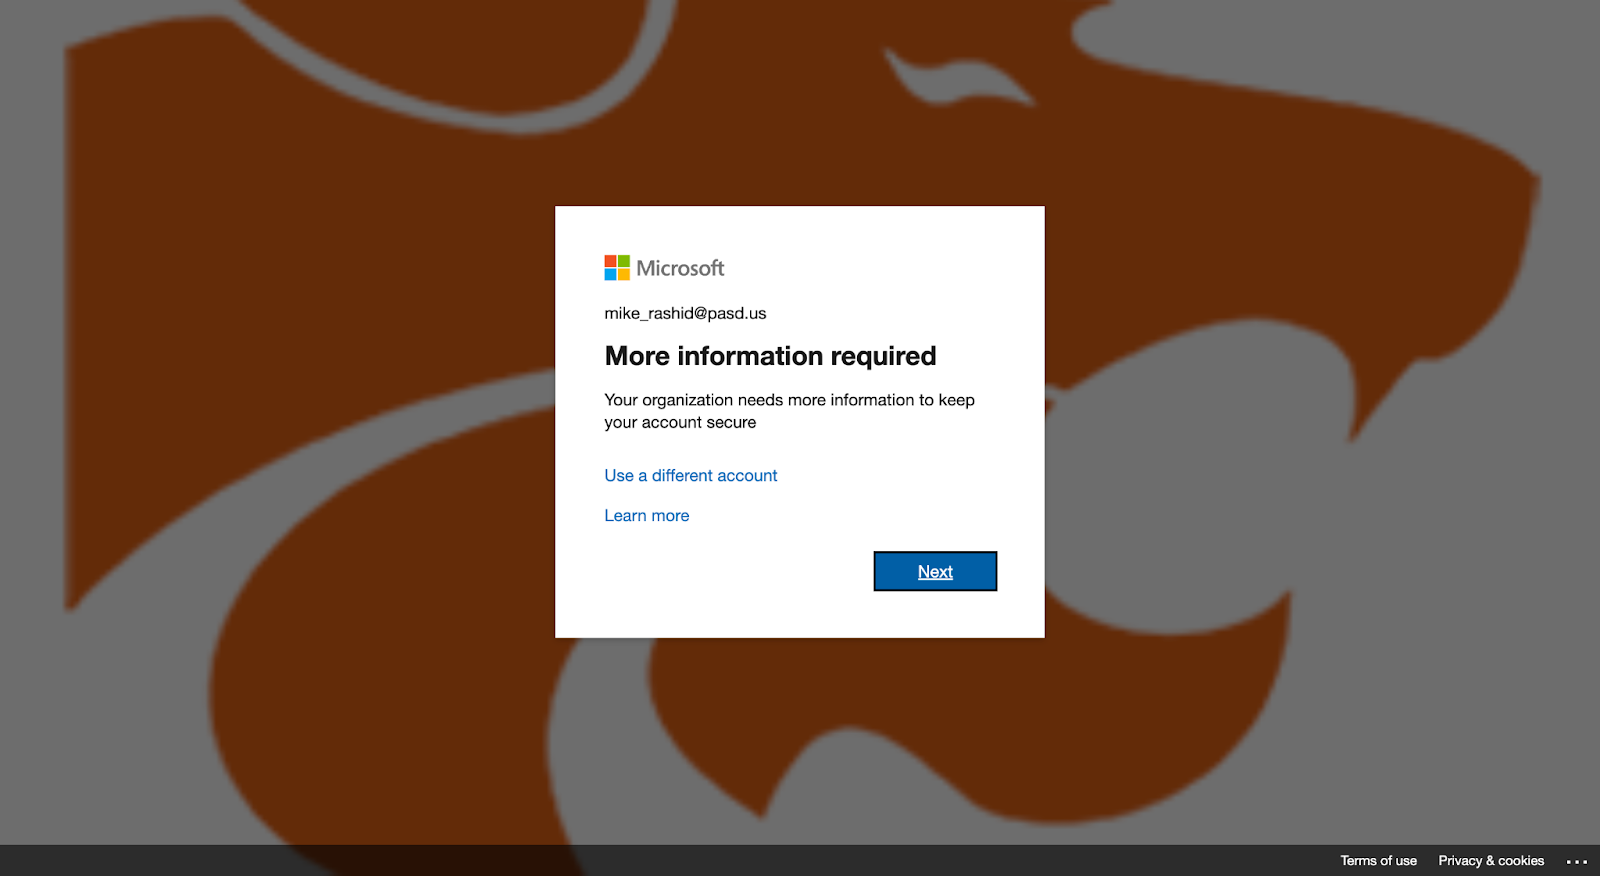
Step 2: Sign back into your email account. When you sign back into your email, you’ll see a “More information required” screen. Choose next.
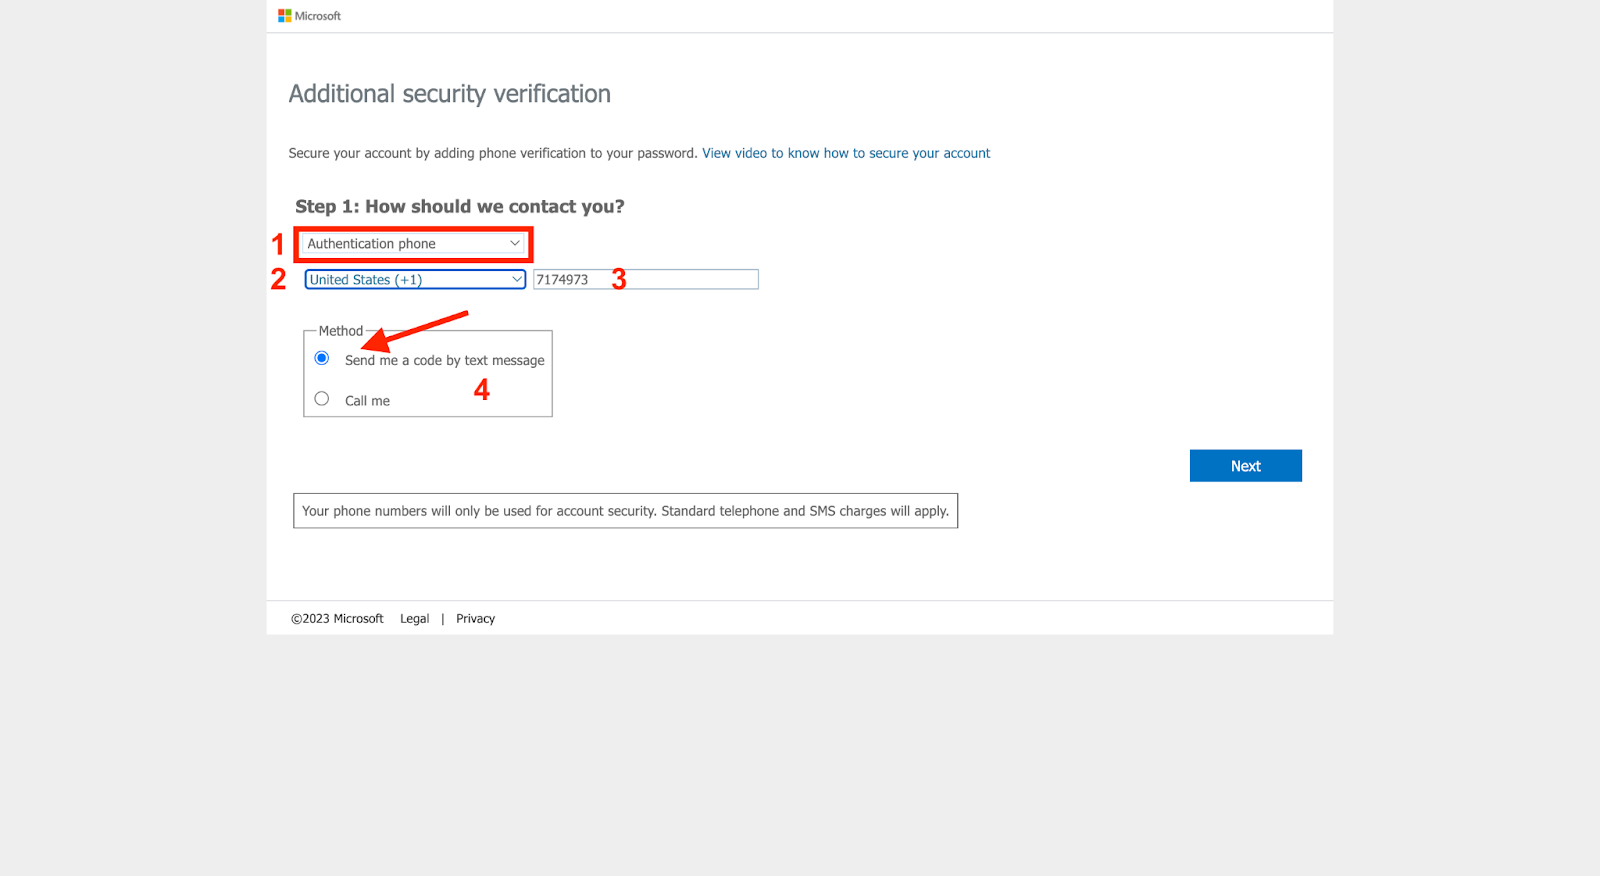
Step 3: Complete “Additional security verification” page. Recommended:
-
Authentication phone
-
Choose United States
-
Enter phone number
-
Choose to have code sent by text or call
Step 4: Enter the text message sent to you on your phone, and select “Verify.”
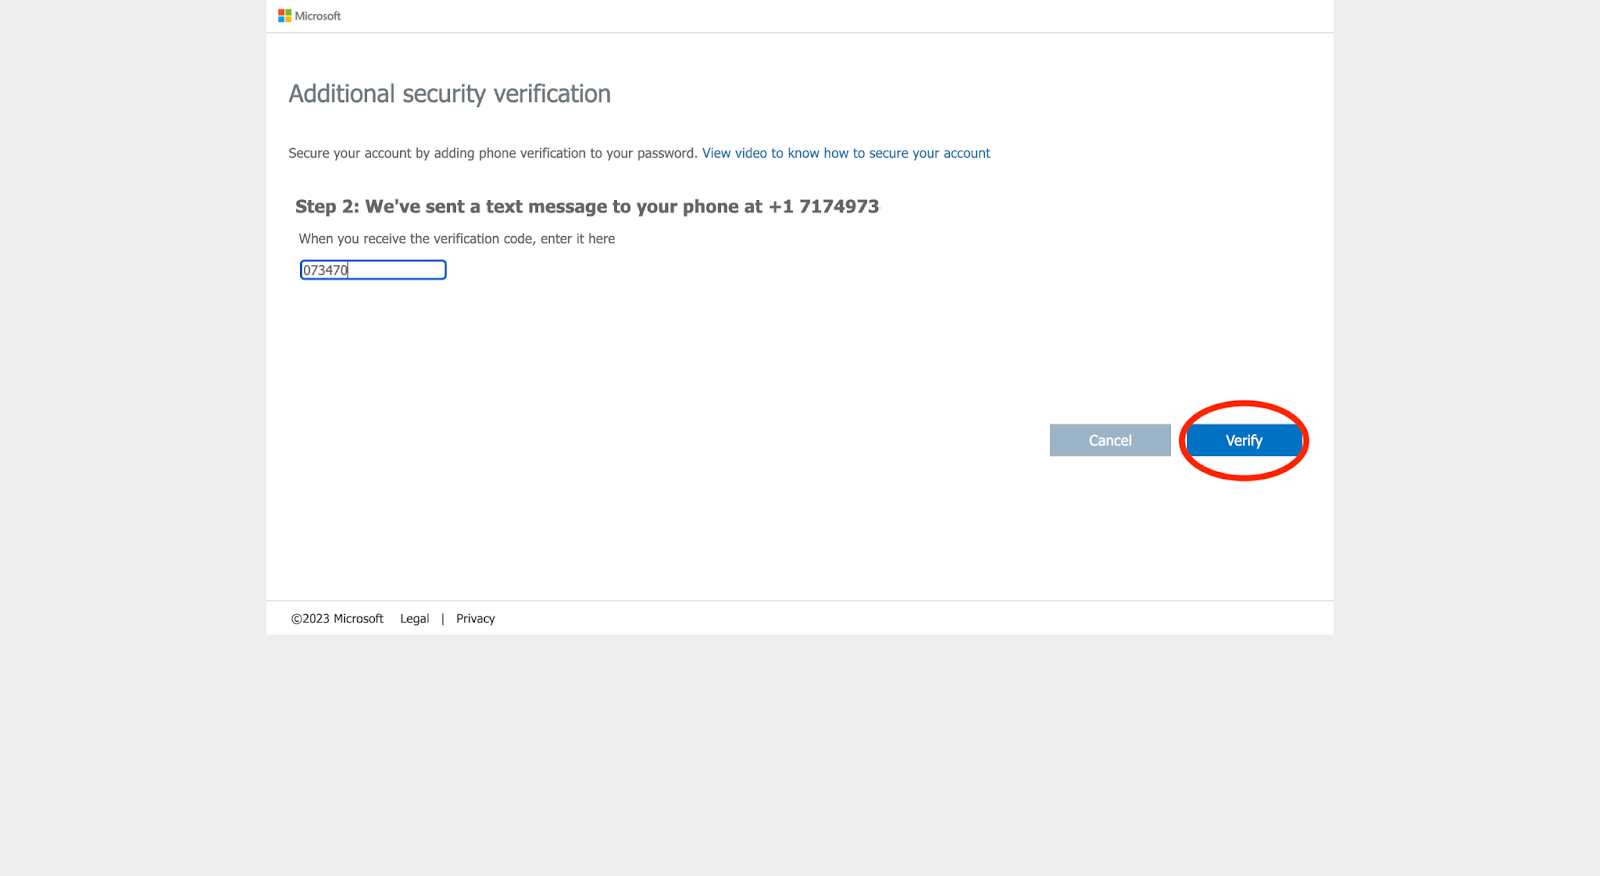
Once verified, select done.
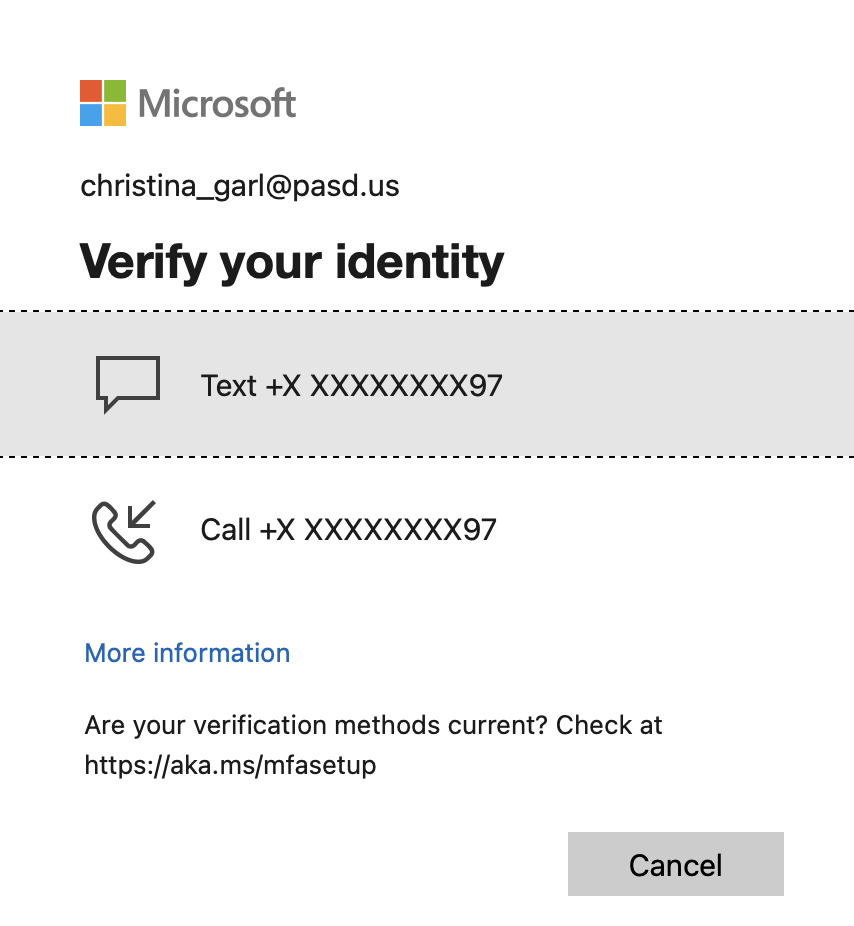
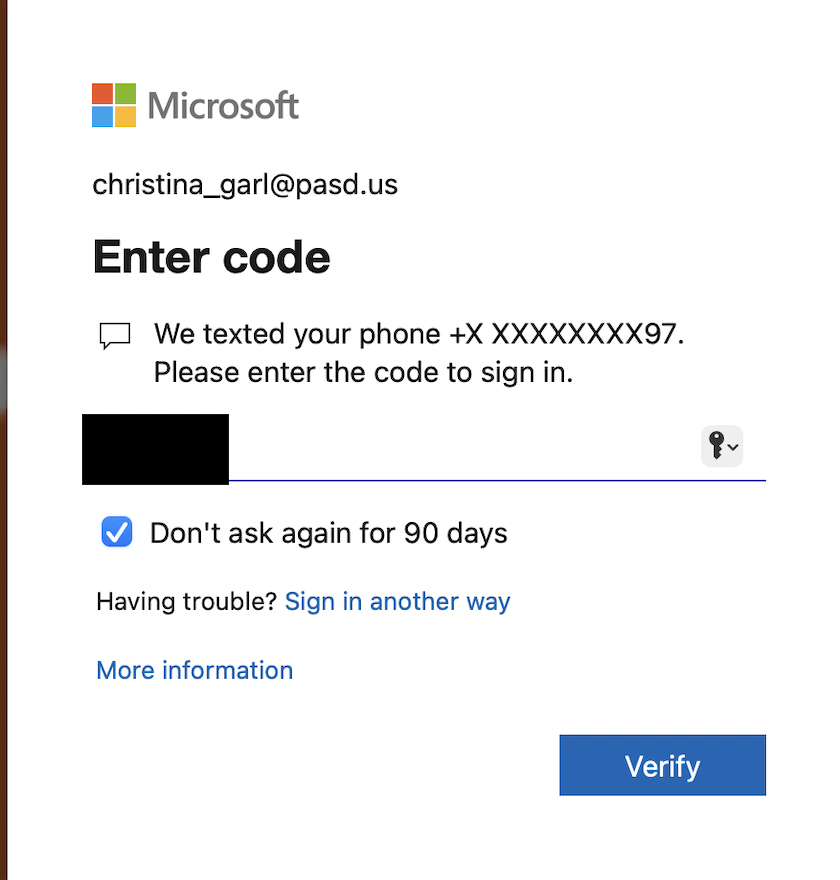
Email will now open and you can resume working. You will be prompted every 90 days to log in again. Once you are prompted again, you will be asked to verify your identity by text or call.
If you notice that you are not receiving email on your phone or iPad, you may need to remove the account on your phone and add it again.

